While their merger with Microsoft has lead to a seemingly complete halt of new device development, some Nokia employees are still hard at work to bring new software to the table.
Nokia's latest project, Z Launcher, is a home screen launcher that aims to give you what you need, when you need it, with little to no effort on your end. By no means is Z Launcher a powerhouse with features like Nova, but what it does have is a simple design with a really interesting way of finding information and apps on your phone, but more on that later.
Currently, Z Launcher is in a limited pre-beta release and is only optimized for a few phones, which means official downloads are in short supply, but who cares about "official"?
Note: If you are rooted, you will need to have the Xposed Framework.
Step 1: Download the APK
Since Z Launcher isn't widely available, simply download the zLauncher.apk (mirror link). After it's downloaded, make sure you have Unknown Sources enabled, then install it like any other app.
For the moment, Z Launcher has only been optimized for the Nexus 5, Samsung Galaxy S5, Galaxy S4, Galaxy S3, Moto X, HTC One, and Sony Xperia Z1, so keep that in mind when installing.
Extra Steps for Rooted Users
Since it is in pre-beta, and the developers do not want to be swarmed with emails about incompatibilities between Z Launcher and other mods, root users are left out in the cold. Normally, that means you'd stop here, but don't worry, I've got you covered.
Step 2: Download the RootCloak Module
To bypass the root check of Z Launcher, you will first need to download the Xposed module RootCloak.

Just as the name implies, RootCloak stops specified apps from realizing they are running on rooted phones, so go to the Download section of Xposed Installer and download. Don't forget to Activate and Reboot afterward.
Step 3: Add Z Launcher to RootCloak
Adding Z Launcher to the list of RootCloak enabled apps is as easy as opening it, tapping the + icon up top, and selecting Z Launcher.
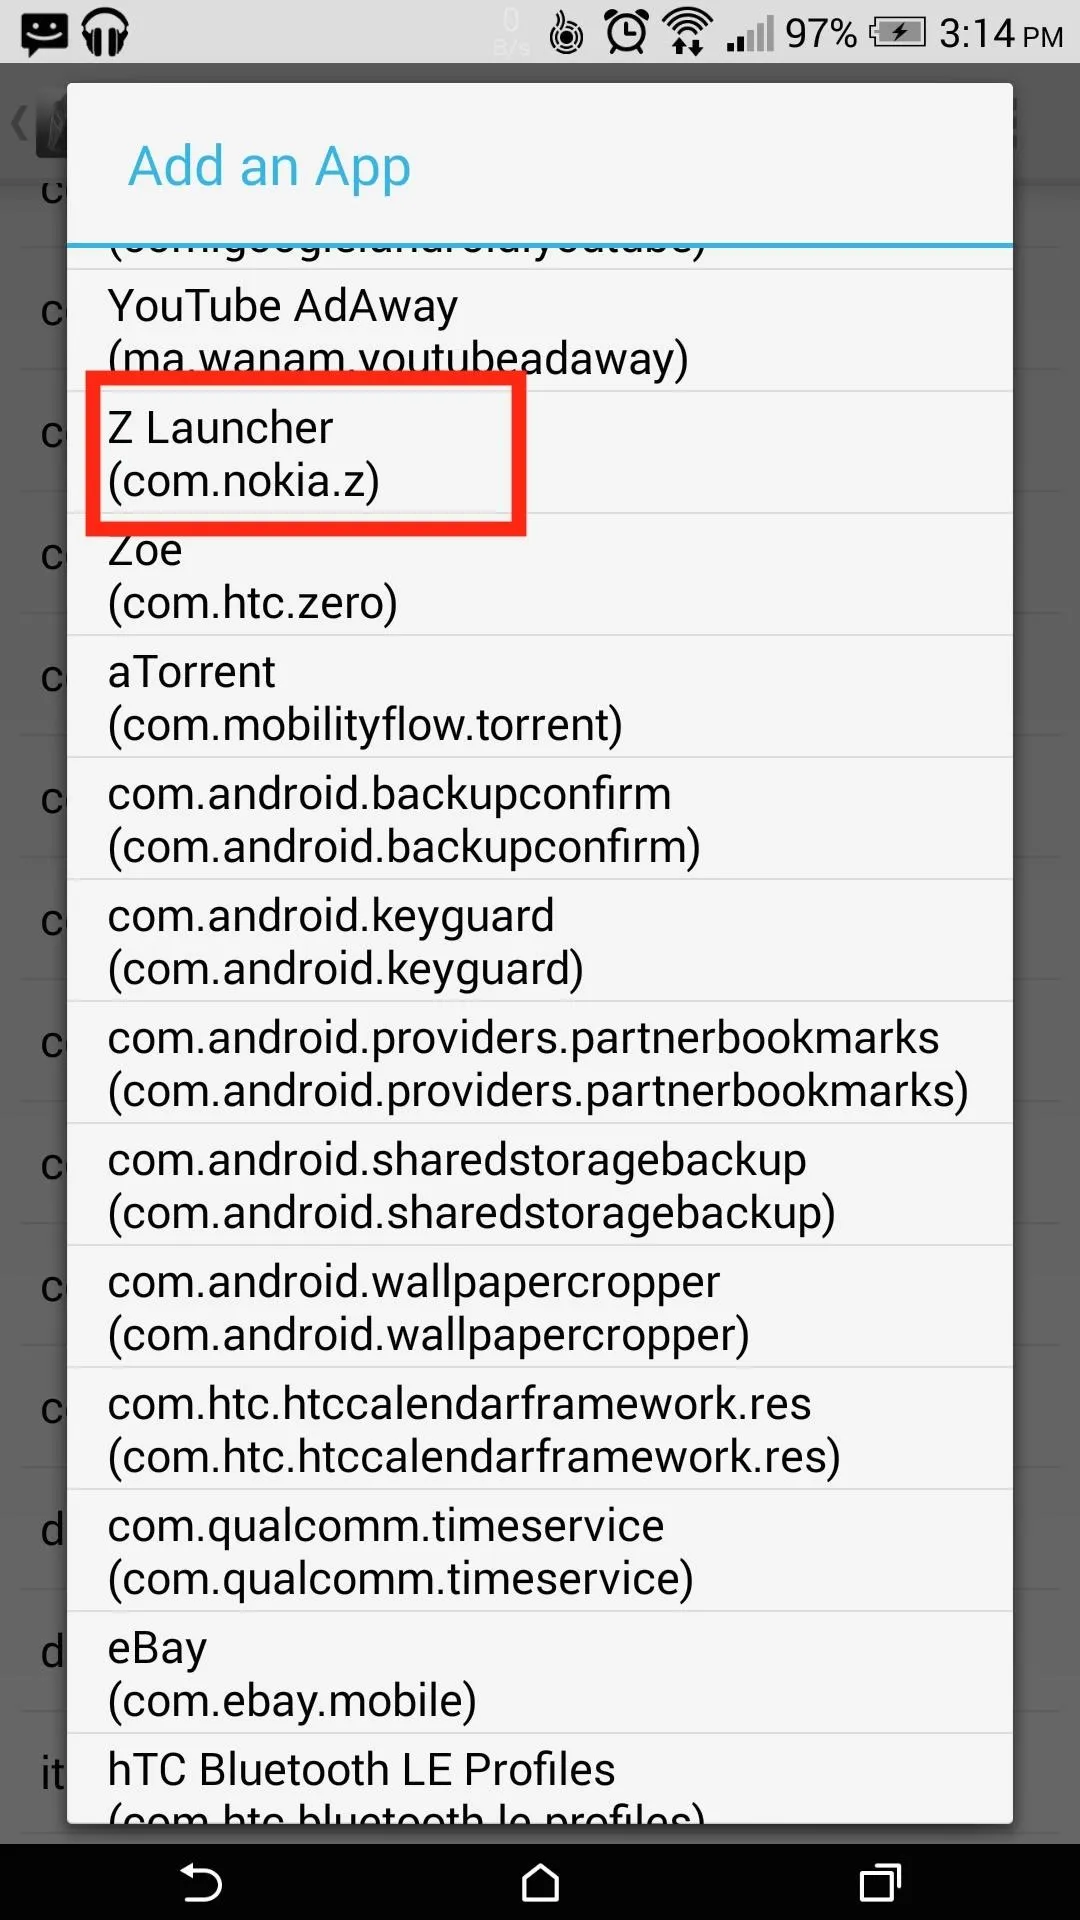
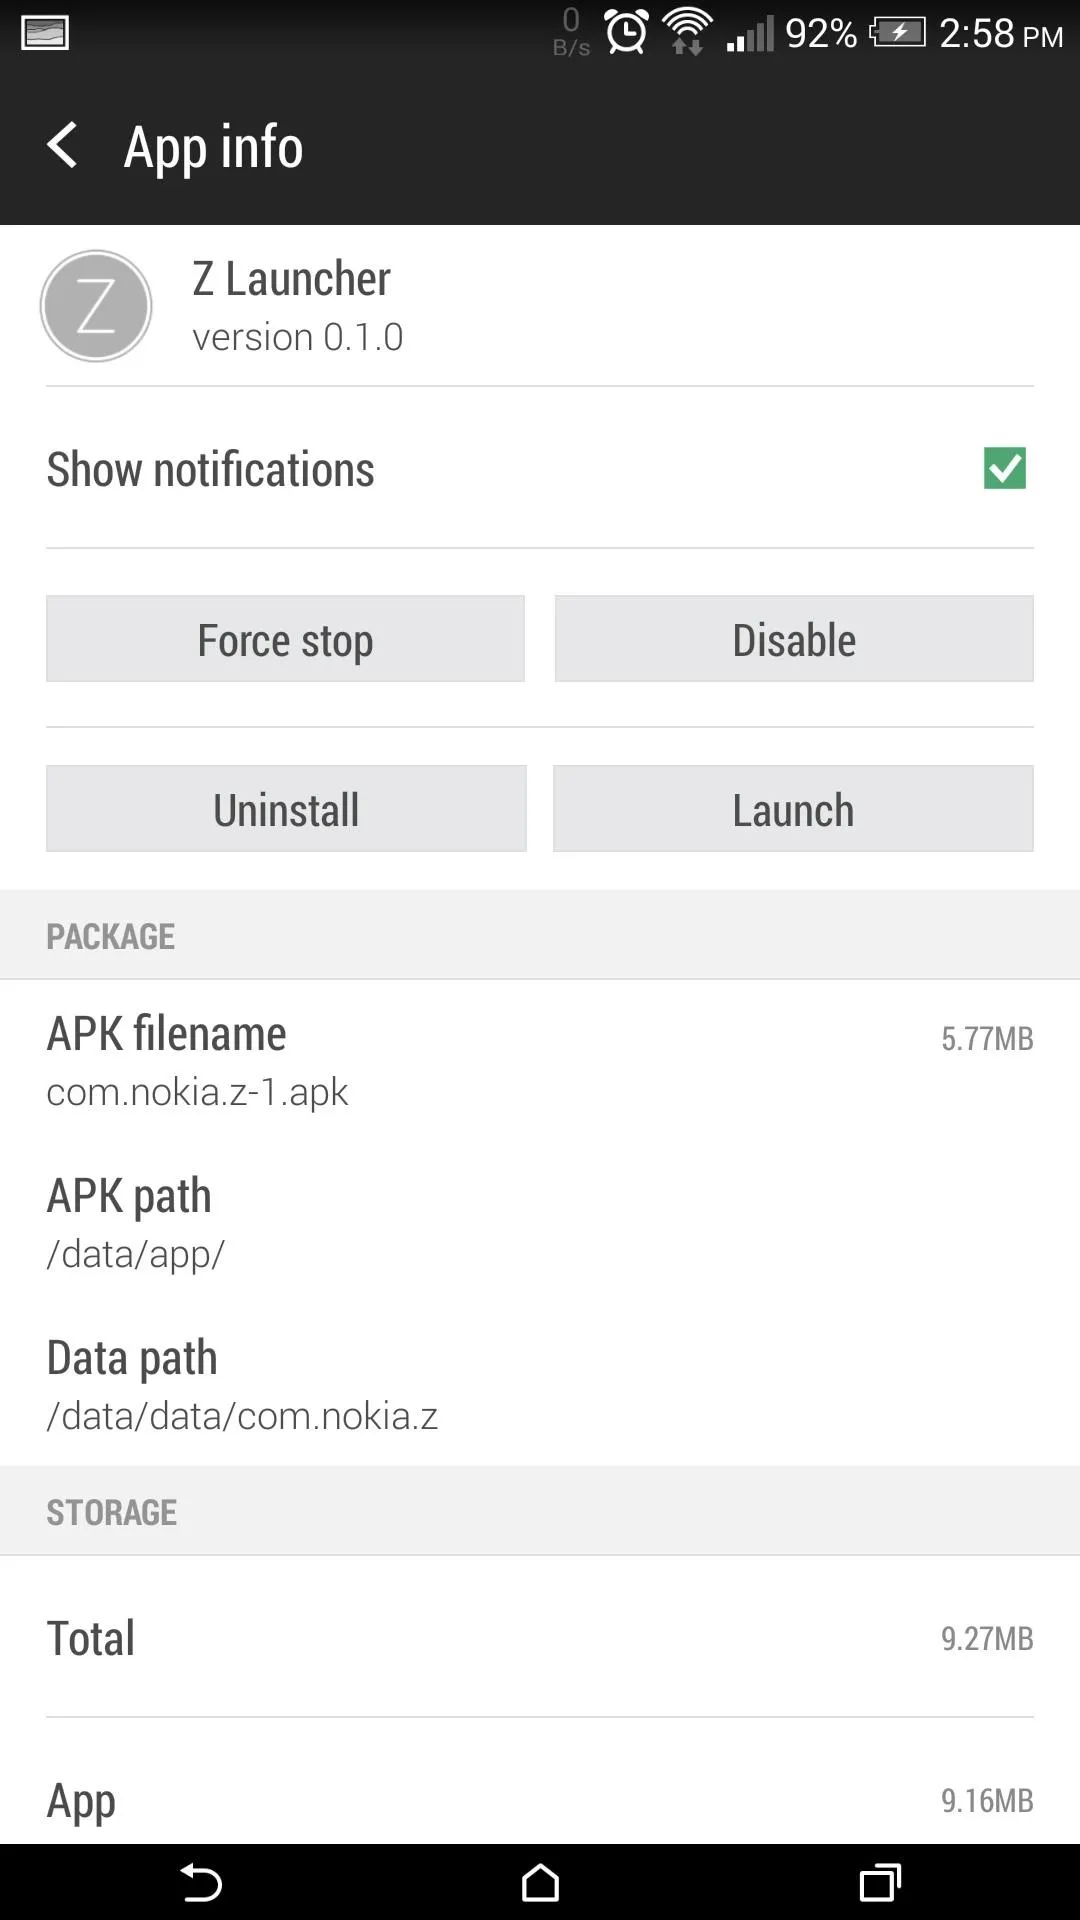


After its added, go to your Settings app and Force stop Z Launcher from the Apps section.
Step 4: Using Z Launcher
Now that we have Z Launcher installed and have removed any root-related roadblocks, go to Settings -> Personalize -> Home screen and select Z Launcher as your new default.
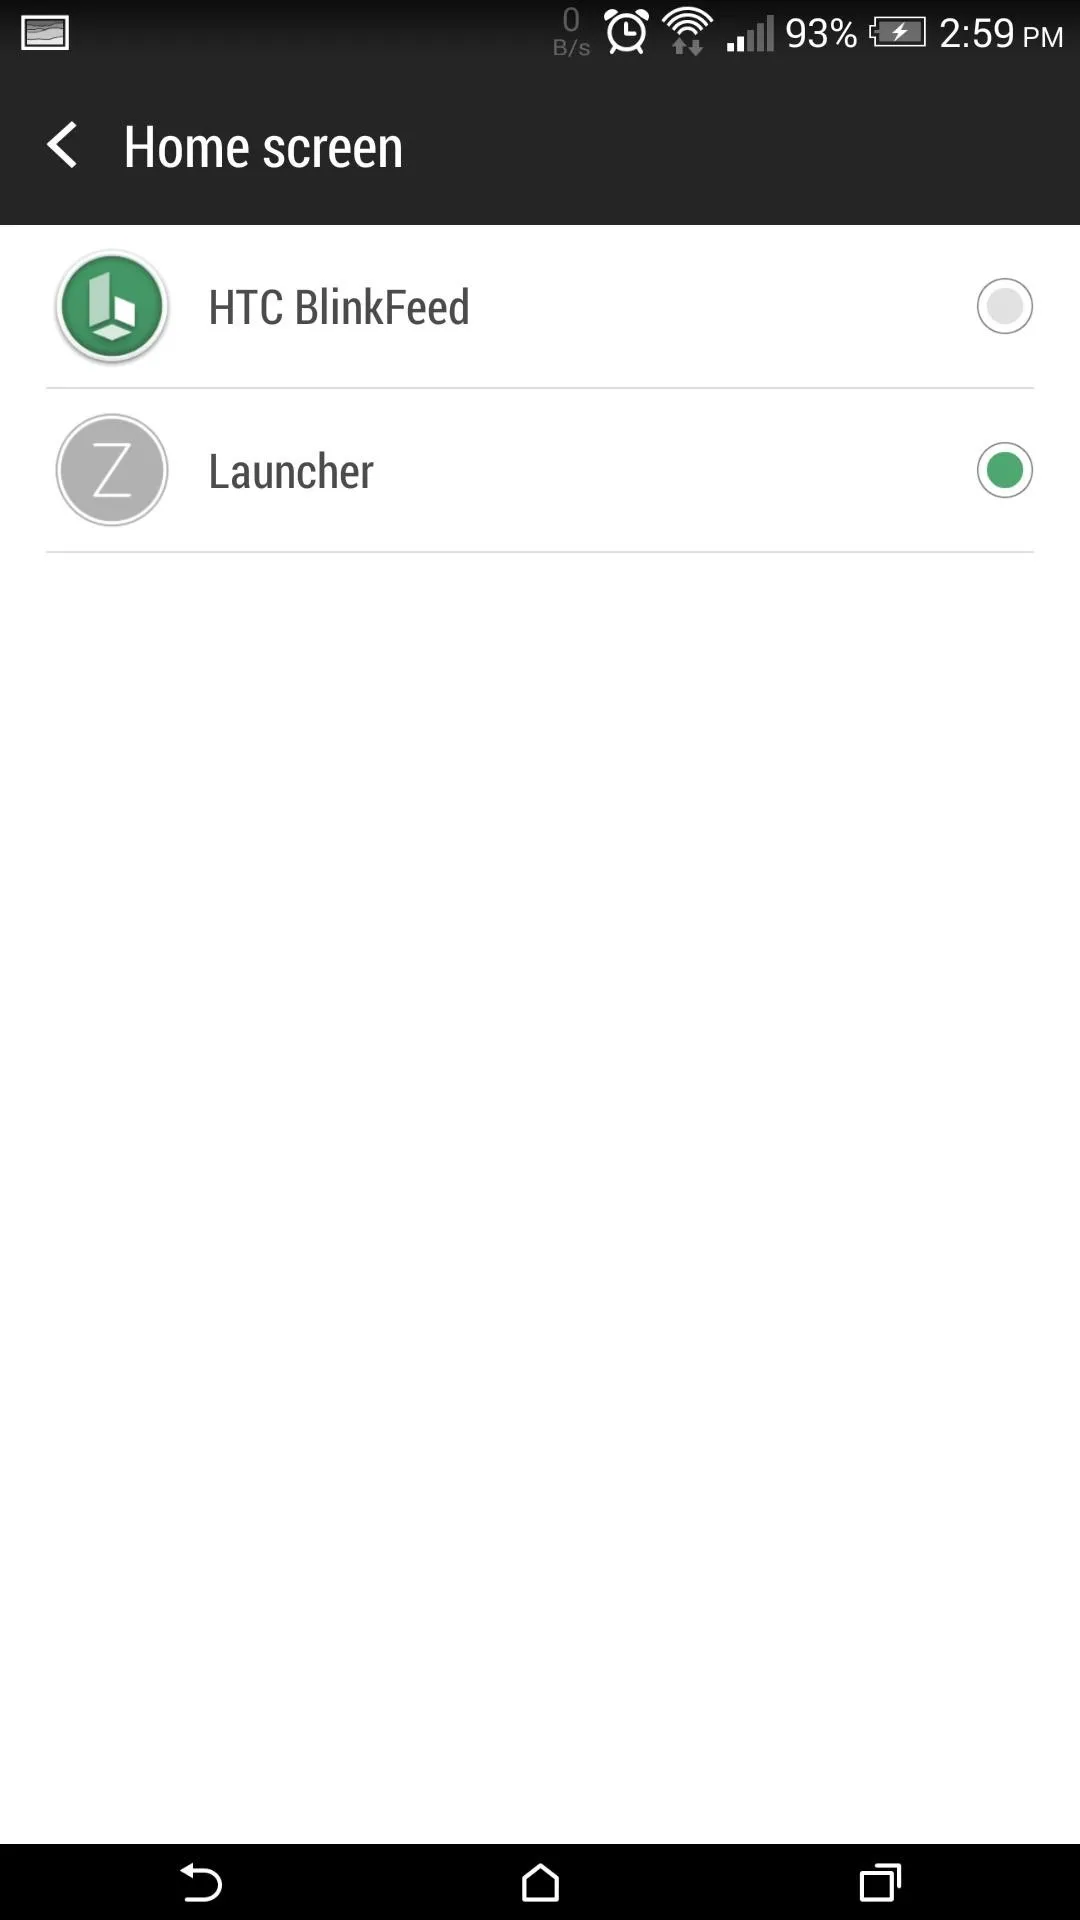
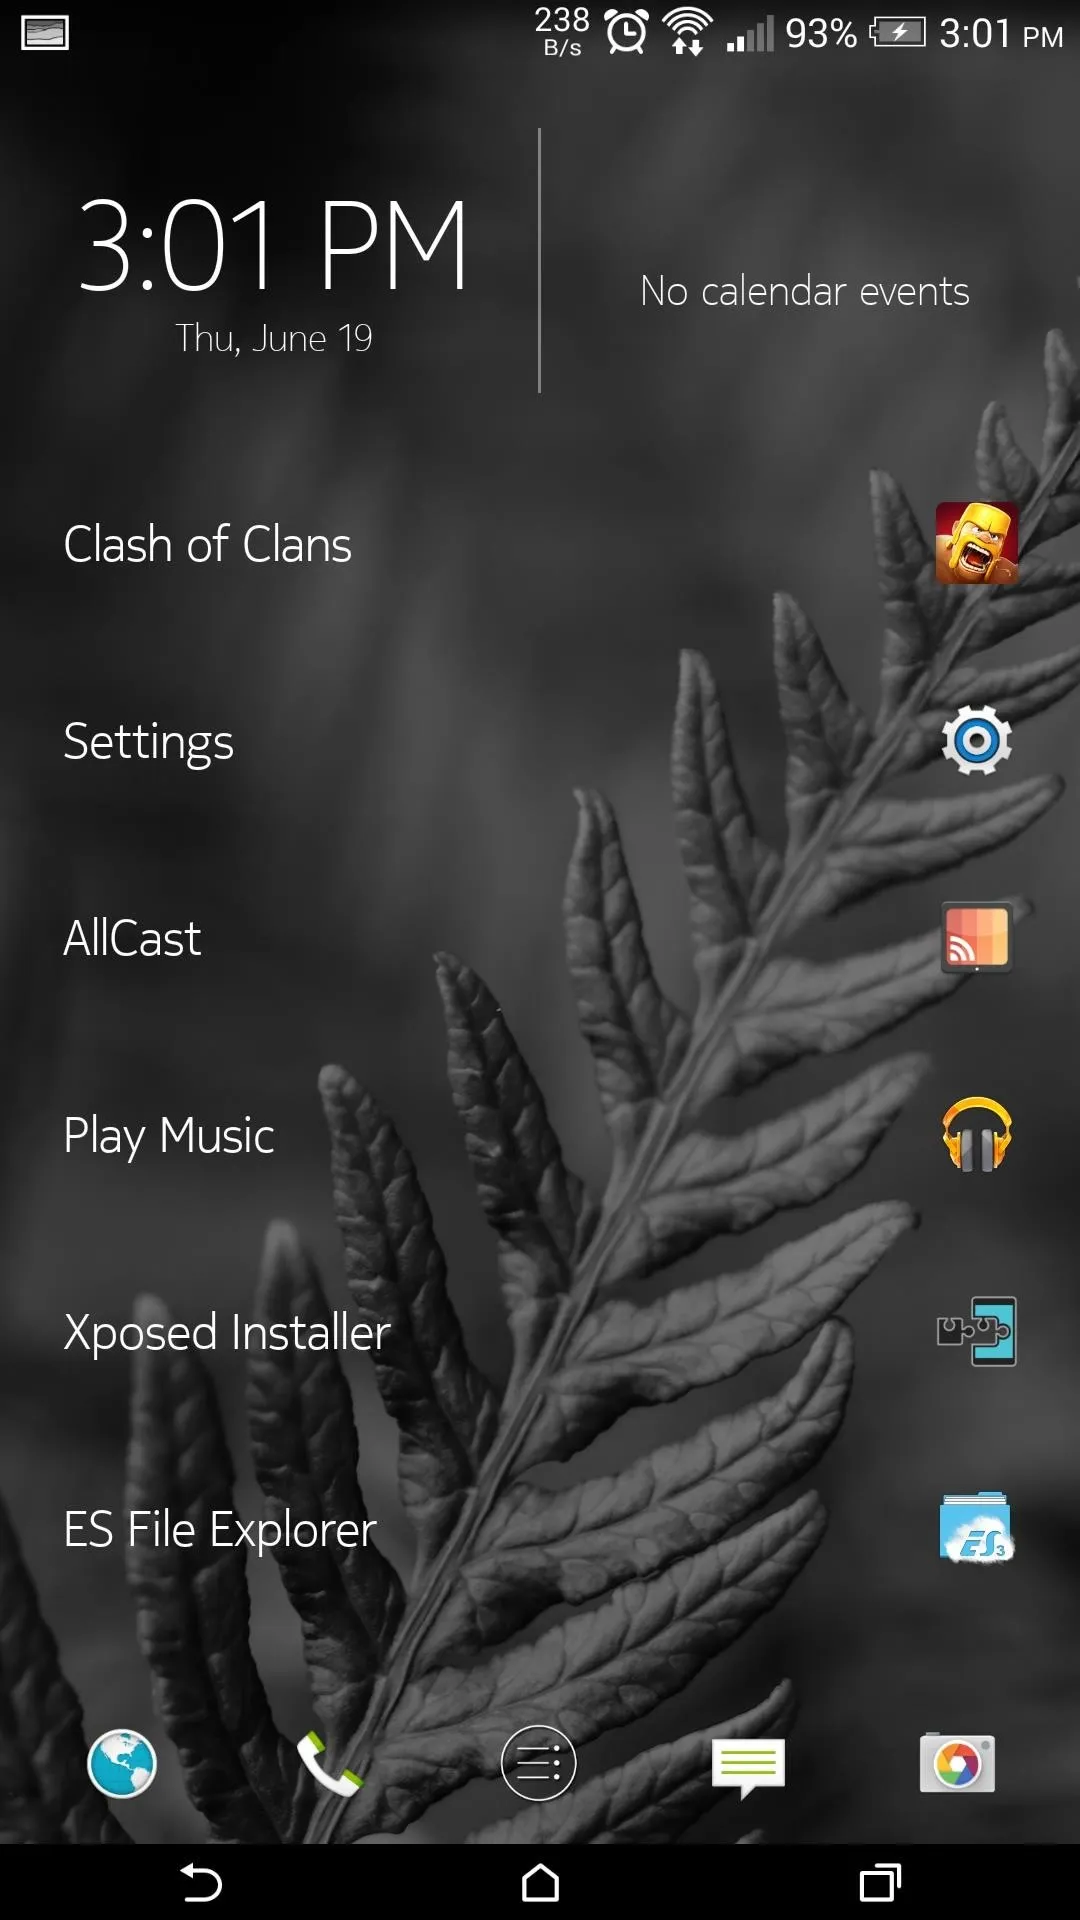


The main screen of Z Launcher has a clock and calendar widget along with a list of apps and contacts. The list changes depending on where you are, the time of day, and other data that the launcher has collected about your usage habits, but don't worry, it's all kept private and secure. As of right now, you cannot add more widgets, but that is a planned feature.
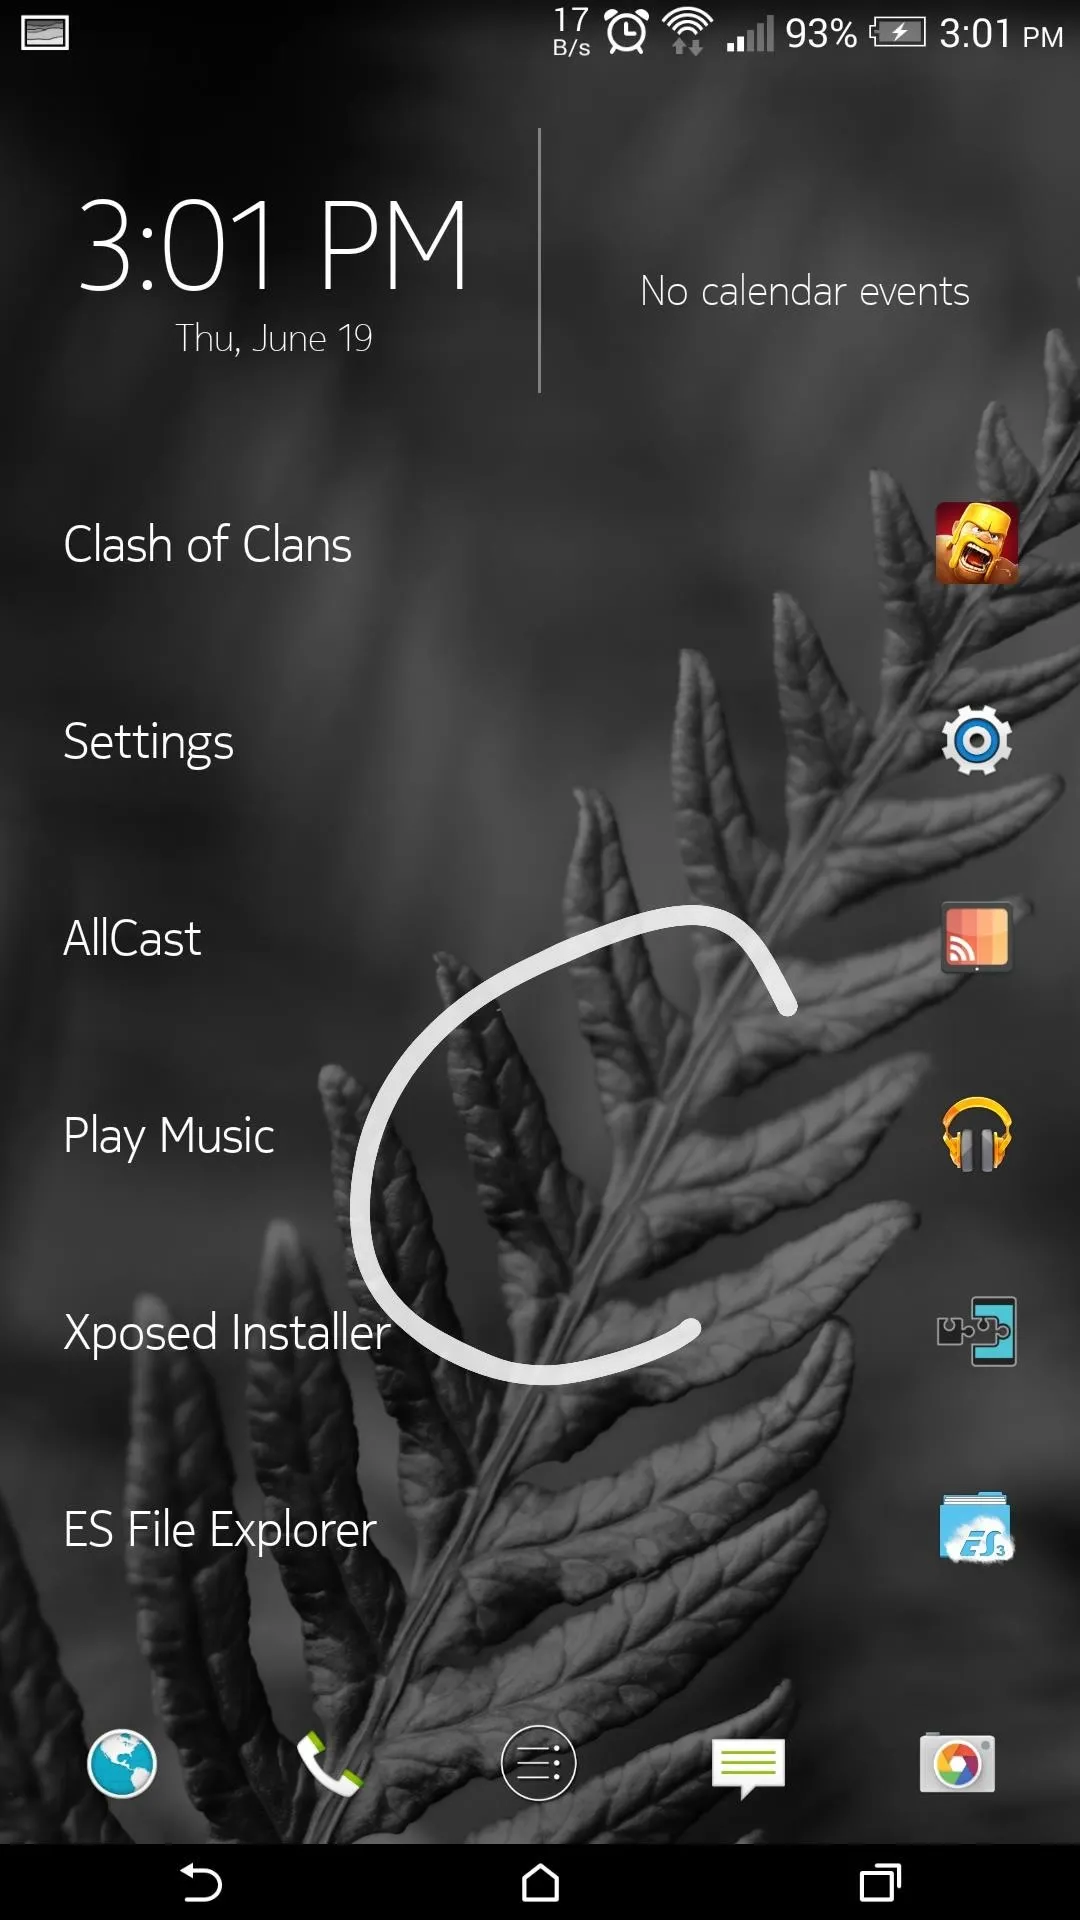
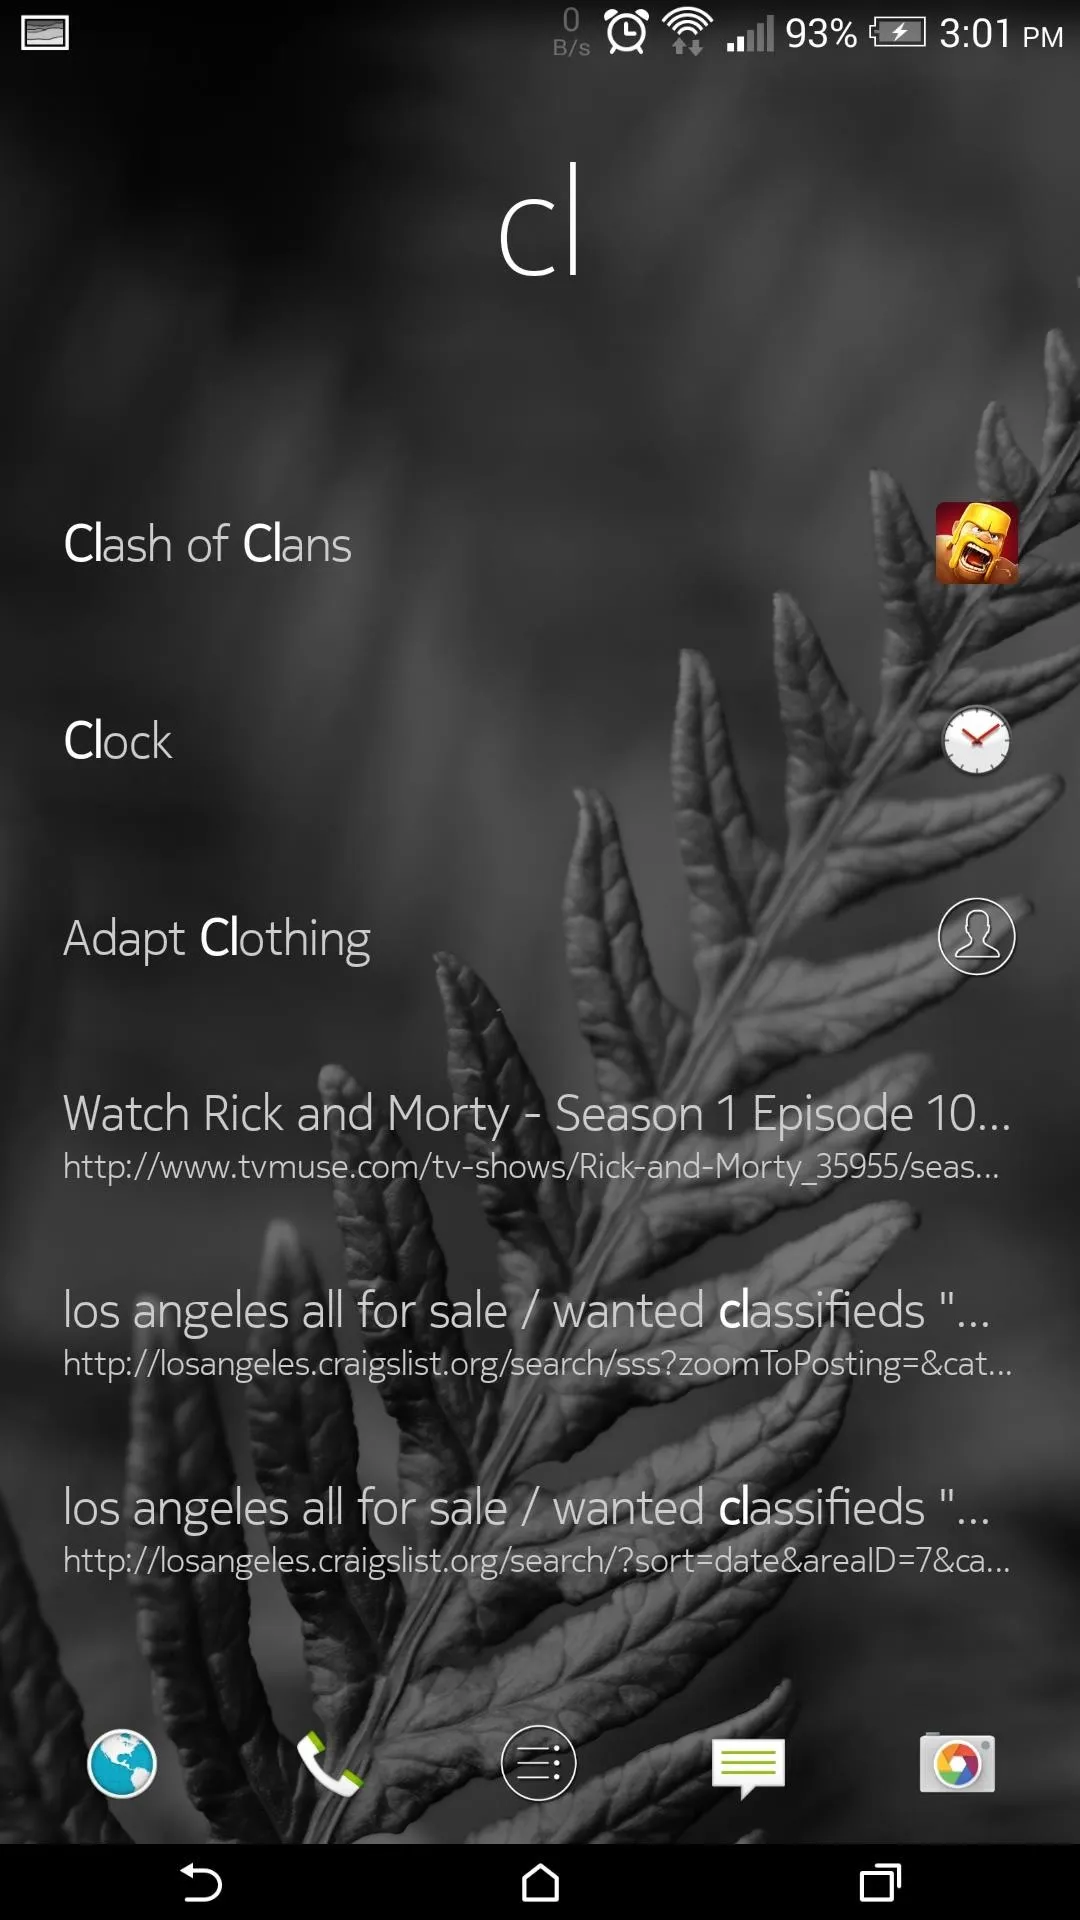


What drew me to Z Launcher was the fact that you can draw letters on the home screen and a list of apps, contacts, and even Google searches will come up. That means that writing "C" on your home screen will bring up all the apps and contacts you have that start with C, and if you keep adding letters, it will start searching Google as well.
As a side tip, swiping to the right will input a space, swiping to the left will delete the last character, and two swipes to the left erases everything.
Other than the drawing feature, there isn't a whole lot to explore with Z Launcher. You have the standard dock and app drawer...and that's about it. Remember that this is still in beta, so expect bugs and some hiccups here and there. If you find anything else interesting tucked into the launcher, be sure to let us know in the comments below.
Cover image via Clinton Jeff



Comments
No Comments Exist
Be the first, drop a comment!