There really isn't any custom manufacturer skin, like Sense, that can match the clean look and fluidity that comes with stock Android. HTC knows this, and they, just like Samsung, include a Google Play Edition version in their flagship lineup.
In effect, these GPE variants put the Nexus experience directly on an HTC One M8, with the added bonus of being able to download Sense apps and taking advantage of advanced hardware. Additionally, GPE devices receive updates sooner than HTC would ever ship to their Sense builds. Only thing is, they cost $700!
As softModders, we can easily convert our carrier-branded HTC One M8s to Google Play Editions by flashing a new RUU, just like if we were prepping our devices to run another carrier's software. And because carrier variants come with subsidized pricing, we can save ourselves a few hundred bucks in the process.
Prerequisites
Before getting started, you are going to need to get a few things out of the way:
- Have USB debugging enabled on your device.
- Make sure your device is S-Off.
- Have an unlocked bootloader.
- Have ADB and fastboot installed on your computer.
- You'll have the option to install a rooted or unrooted version of the Google Play Edition ROM, so download whichever you prefer.
Step 1: Boot Your Device into RUU Mode
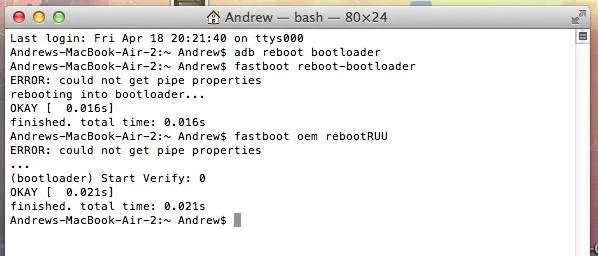
Plug your device into your computer and open a command prompt on your PC. In terminal, type adb reboot bootloader to see the bootloader menu on your phone.

Once you see the bootloader menu, type fastboot reboot-bootloader to prevent any errors from coming up.
Now, to get your device into RUU mode, type fastboot oem rebootRUU, and you'll know you're in the right place when you see a black screen with a silver HTC logo.

Step 2: Flash the GPE RUU
With your device ready to go, you are going to need the RUU, or ROM Update Utility, for the Google Play Edition. A RUU is a recovery file that contains the stock ROM, radio, firmware, and recovery that ships with your phone—in the this case, it will contain all the Google Play Edition stock files.
Grab either the rooted or unrooted version, and to start flashing the file you selected, place it on your desktop and type the following into ADB:
fastboot flash zip RUU-HTC_One_M8_GE-4.4-3.62.1700.16.zip
Change the last part to RUU-HTC_One_M8_GE-1.16.1700.16_rooted.zip if you are installing the rooted version.

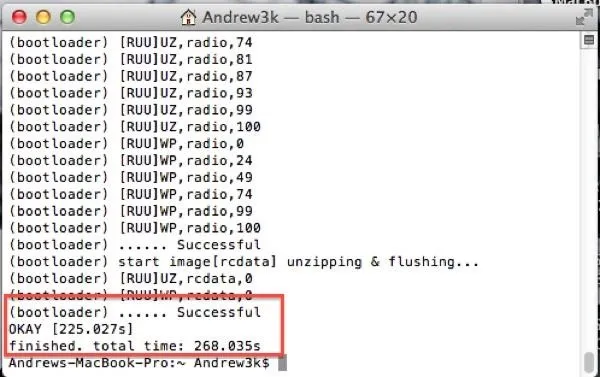
In the command prompt, you will see a line that reads FAILED (remote: 90 hboot pre-update! please flush image again immediately), which is to be expected. To continue, just re-run the same command as before:
fastboot flash zip RUU-HTC_One_M8_GE-4.4-3.62.1700.16.zip
Again, change the last part if you are flashing the rooted version.

Once the flashing has begun, you will see a progress bar appear under the HTC logo on your device, and terminal will display the progress as well.
Step 3: Clear Cache & Reboot
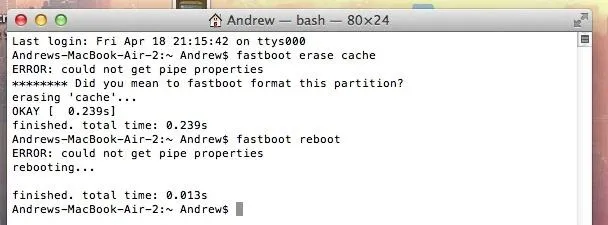
When flashing is complete, you will need to wipe the cache to prevent boot-loops, and reboot your system.
fastboot erase cache
fastboot reboot

Your device will now reboot, and you will need to go through the setup process as if you were turning your phone on for the first time. After the process completes, you will be ready to go with a completely stock version of Android running on your M8, with the added bonus of perks like Duo Camera and BoomSound.


Comments
No Comments Exist
Be the first, drop a comment!